Venting a portable AC in an RV involves using a window vent kit or creating a custom venting solution to exhaust hot air outside the vehicle. Proper ventilation is crucial to maintain the AC’s performance and prevent heat buildup inside the RV.
Page Contents
- 1 Venting Portable Ac In An Rv: Essential Tips
- 2 Assessing Your Rv’s Space
- 3 Choosing The Right Portable Ac
- 4 Installation And Vent Setup
- 5 Sealing And Insulation Tips
- 6 Venting Through Windows And Other Openings
- 7 Maintenance For Optimal Performance
- 8 Climate Considerations And Adjustments
- 9 Energy Efficiency And Eco-friendly Practices
- 10 Frequently Asked Questions Of How To Vent Portable Ac In Rv
- 11 Conclusion
Venting Portable Ac In An Rv: Essential Tips
Venting your portable AC properly in your RV is crucial for optimal performance and efficient cooling. By understanding the importance of proper ventilation, you can ensure that your RV stays cool and comfortable even in sweltering temperatures.
Proper AC ventilation in an RV helps to maintain the overall temperature balance inside. It allows for the expulsion of hot air, preventing the build-up of heat and enhancing the efficiency of the cooling system. Without proper ventilation, the portable AC may struggle to cool the RV effectively, leading to increased energy consumption and discomfort.
| Venting Option | Description |
|---|---|
| Window Vent Kit | A popular option that utilizes a window panel to exhaust hot air outside. |
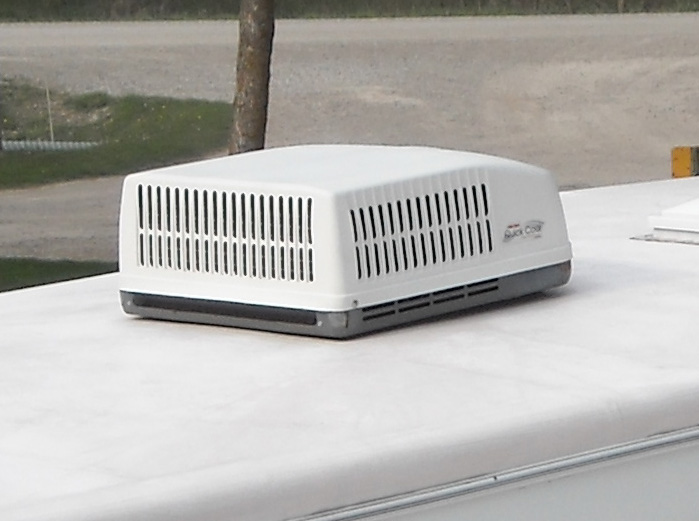
| Roof Vent | Allows for hot air to be ventilated through the RV’s roof. |
| Side Vent | A convenient option for RVs with no suitable window or roof access. |
Each of these venting options has its advantages and considerations, so it’s essential to choose the option that best suits your RV’s layout and needs.
When determining the ideal location for your AC vent, consider factors such as proximity to the cooling area, access to suitable venting options, and minimal obstruction for efficient airflow. Placement near the center of the RV can promote even cooling throughout.
Assessing Your Rv’s Space
Assessing the layout of your RV is crucial when it comes to venting a portable AC. Evaluating the available space is the first step in determining the best position for installation. Look for areas where the vent can be easily mounted and where it will have optimal air circulation. Take into consideration the impact of your RV’s orientation on AC performance. Placing the vent in a location that allows for efficient cooling is essential. Keep in mind that the position of the vent can affect the overall effectiveness of your cooling system. By carefully evaluating your RV’s layout and considering its orientation, you can make informed decisions on where to install your portable AC vent.
Choosing The Right Portable Ac
A key consideration when venting a portable AC in an RV is choosing the right unit for your specific needs. It is important to match the size of the AC with the dimensions of your RV to ensure efficient cooling. The AC should be able to effectively cool the entire space without straining the unit or causing unnecessary energy consumption.
When selecting a portable AC unit for your RV, there are several key features to look for. These include adjustable fan speeds, programmable timers, and a remote control for convenience. Additionally, it is beneficial to choose a unit with a built-in air purifier and dehumidifier to improve air quality inside the RV.
Understanding BTU ratings is also crucial when it comes to selecting a portable AC for your RV. BTU, or British Thermal Units, measures the cooling capacity of an air conditioner. It is important to choose a unit with the appropriate BTU rating based on the size and insulation of your RV.
By considering these factors and selecting the right portable AC unit, you can effectively cool your RV and enjoy a comfortable camping experience.
Installation And Vent Setup
Installing a portable AC vent in your RV is a straightforward process that can greatly improve the comfort of your travels. Here is a step-by-step guide on how to install the AC vent:
| Tools | Materials | |
|---|---|---|
| 1 | Drill | Portable AC unit |
| 2 | Tape measure | Vent hose |
| 3 | Screwdriver | Foam insulation tape |
| 4 | Pliers | Mounting brackets |
Customizing the vent routes is crucial for maximum cooling efficiency. Consider the layout of your RV and identify the best location for the AC unit. Measure and mark the area where you will install the vent. Use a drill to create the necessary holes and attach the mounting brackets. Connect the vent hose to the AC unit and secure it with clamps. Finally, cover any gaps with foam insulation tape to ensure proper sealing.
By following these steps and customizing the vent routes to suit your RV, you can enjoy the benefits of a properly installed portable AC vent, keeping your RV cool and comfortable during your travels.
Sealing And Insulation Tips
When installing a portable AC in an RV, ensuring proper sealing and insulation around the vent is crucial for enhanced efficiency and comfort. An airtight seal around the vent plays a significant role in preventing air leaks and maintaining the desired temperature inside the RV.
Selecting the right insulation material is essential to improve the efficiency of the AC vent. Proper insulation helps in minimizing heat transfer and maintaining the temperature inside the RV. Some popular options for insulation include foam insulation tapes, weatherstripping, or even reflective insulation which can provide additional heat resistance.
In addition to using specialized insulation materials, several DIY solutions can be implemented to enhance vent insulation. One such solution is applying window film or reflective film to the vent to deflect heat and reduce the load on the AC unit. Another option is using foam inserts to create a snug fit between the vent and the RV wall, preventing air leaks.
By following these sealing and insulation tips, RV owners can optimize the performance of their portable AC units and enjoy a more comfortable camping experience.
Venting Through Windows And Other Openings
One of the most important aspects of using a portable AC in an RV is proper venting. Venting through windows and other openings is a popular choice for RV owners. Adapting window kits for AC venting in an RV is a convenient option. It allows you to easily and securely install the vent through a window without causing any damage to the RV.
Another option to explore is utilizing existing skylights and roof vents. These openings can be modified to accommodate the AC vent, providing efficient ventilation throughout the RV. It is important to ensure proper insulation and sealing to prevent any air leakage or water damage.
In addition, utilizing existing openings in the RV, such as cabinets or storage compartments, can be a clever way to place the vent and save space. By strategically positioning the vent, you can maximize air circulation and cooling efficiency.
Remember to always refer to the manufacturer’s instructions and guidelines for the specific AC unit and RV model you have. Proper venting will ensure optimal performance and comfort during your RV adventures.
Maintenance For Optimal Performance
To ensure optimal performance, it’s crucial to know how to properly vent portable AC units in RVs. By following the correct maintenance steps, you can keep your AC functioning efficiently and cool your vehicle effectively.
Routine Maintenance Checklist For Portable Ac Units
To ensure your portable AC unit operates efficiently in your RV, regular maintenance is crucial. Follow this routine maintenance checklist:
- Clean or replace air filters: Blocked filters restrict airflow, reducing performance. Clean reusable filters regularly or replace disposable ones as recommended by the manufacturer.
- Clean the condenser coil: Dust and debris can accumulate on the condenser coil, affecting cooling capacity. Gently vacuum or brush the coil to remove any build-up.
- Check for leaks: Inspect the unit for any signs of coolant leakage. If leaks are detected, contact a professional for repair.
- Inspect exhaust hoses and vents: Make sure the hoses and vents are clear of obstructions like dust, dirt, or debris. Clean them regularly to maintain proper airflow.
Cleaning And Care Tips To Prolong Ac Life
In addition to routine maintenance, follow these cleaning and care tips to extend the lifespan of your portable AC:
- Keep the unit clean: Wipe the exterior surfaces and remove any dust or dirt using a soft cloth. Avoid using harsh chemicals.
- Ensure proper ventilation: Position the AC unit in a well-ventilated area to prevent overheating. Maintain a clear space around the unit for adequate airflow.
- Store properly when not in use: If you’re not using the AC for an extended period, clean it thoroughly, then store it in a clean, dry place.
Troubleshooting Common Venting Issues
If you encounter venting issues with your portable AC unit, consider the following troubleshooting steps:
| Issue | Solution |
|---|---|
| No airflow through vents |
|
| Hot air blowing instead of cool air |
|
Climate Considerations And Adjustments
When it comes to venting your portable AC in an RV, there are a few climate considerations and adjustments you need to keep in mind. Adapting your venting strategy for different weather conditions is crucial for efficient cooling. During hot and sunny days, utilizing shades and awnings can assist in keeping the RV cool and reducing the workload on the AC unit. These measures help optimize AC use and prevent excessive heat buildup inside the vehicle.
Additionally, extreme temperatures require careful management of AC usage. During scorching hot days, it’s important to set the AC temperature at a comfortable level but not too low, as this can strain the system and lead to inefficiency. On the other hand, during extremely cold weather, it’s essential to insulate the RV effectively to minimize heat loss and prevent the AC from running excessively.
In conclusion, adapting your venting strategy according to weather conditions and utilizing additional cooling methods such as shades, awnings, and insulation can significantly improve the performance of your portable AC in an RV.
Energy Efficiency And Eco-friendly Practices
When it comes to using a portable AC in an RV, it is important to focus on energy efficiency and eco-friendly practices. There are several ways to reduce energy consumption while running AC in your RV:
| Methods | Description |
|---|---|
| 1. Renewable energy options | Consider using renewable energy sources, such as solar panels or wind turbines, to power your portable AC unit. This not only reduces your environmental impact but also saves on energy costs. |
| 2. Balancing comfort and impact | Find a balance between staying comfortable and minimizing your environmental impact. Set the temperature at a reasonable level and use energy-saving settings on your AC unit. |
By implementing these energy-efficient practices, you can enjoy the comfort of a portable AC in your RV while minimizing your carbon footprint and energy consumption.
Credit: www.rvrepairclub.com
Frequently Asked Questions Of How To Vent Portable Ac In Rv
How Do You Vent A Portable Ac In An Rv?
To vent a portable AC in an RV, you can use the existing roof vent by attaching a venting kit, or create a new vent hole in the sidewall. Ensure proper sealing to prevent air leaks and make sure the vented air is directed outside the RV, not inside another compartment.
Can You Use A Dryer Vent For A Portable Ac In An Rv?
Using a dryer vent for a portable AC in an RV is not recommended. Dryer vents are designed for warm air and moisture, while AC units produce cool air and condensation. It is best to use the dedicated venting kit provided with the portable AC or create a proper venting system for optimal performance.
What Size Vent Do I Need For My Portable Ac In An Rv?
The size of the vent you need for your portable AC in an RV depends on the size and specifications of your AC unit. Check the manufacturer’s guidelines or consult with a professional to determine the appropriate vent size. Improper vent sizing can affect the cooling efficiency and overall performance of the AC.
Conclusion
To sum it up, venting a portable AC in an RV is a crucial step for maintaining a comfortable and efficient cooling system. By following the steps highlighted in this blog post, you can ensure that your portable AC functions optimally, prolonging its lifespan and enhancing your overall RV experience.
Remember to regularly clean and inspect the venting components to prevent any potential issues. So, get ready to enjoy those road trips without worrying about the scorching heat!